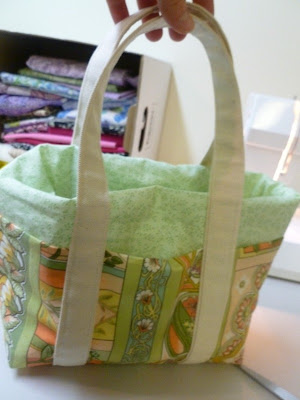
I found instructions to make this bag online at Better Homes and Gardens, and decided to give it a whirl.
I learned to sew in junior high. When many of my peers were taking foreign language, I decided to wait until high school and take a bunch of electives instead. I learned a lot about sewing, cooking, and art and am SO glad I did that! Ironically, I became a Spanish teacher so it didn't hinder my language learning at all :)
The directions from the link above were good, but here are my photos and basic steps in the process. You'll need the directions from BHG to make the bag to their exact measurements.
Making the straps- wide strap folded in half vertically, then sides folded into center- four layers thick!

Sew batting, both fabric layers (one folded to make lined pockets) and straps
Sew along straps to above outer fabric a couple of inches- see instructions for exact measurements (pin marks the point I sewed up to)
First side finished
Showing side pocket. Bottom and straps are stitched
From the bottom- you can see the stitched areas
Place both bag layers right side together. Stitch around entire outside of bag, leaving a 5" opening in the lining for turning (opening can be seen on left side)
View from the inside through 5" opening
Fold bag to bottom and side seams are touching, and flatten corner into a triangle. Draw a line 2" from point that is 4" long. This gives the bag its boxy shape.
Stitch across line and trim excess fabric
Do the same thing on lining corners
Turn bag inside out through 5" opening
Preparing to slipstitch 5" seam
To make a knot in the end of the thread, wrap it around your finger once. Roll thread off of your finger so it twists up. Then, pull toward the end to make a knot!
To finish the stitch, wrap the thread around the needle while still in the fabric. I usually wrap about 5 times. Then, pull the needle through the thread to make a knot. Maybe I'll do a tutorial post on basic sewing skills in case anyone wants to learn, and link here if I do!
Finished bag, before pressing
Finished six-pocket tote!
Perfect for a small diaper tote!
Stuff fits into the outside pockets too- I forgot to put something in there for the photo. They fit my cell phone quite well and are a good size for diaper cream or a little toy.


This comment has been removed by the author.
ReplyDeleteAwww thanks you so much!! Im a beginner at sewing and really and this step by step REALLY helps! as the BHG was difficult to be to follow...
ReplyDeleteJackie
Http://jackietorres.blogspot.com
PS I will post my creation :) at my blog tomorrow..maybe you can take a look a give me any advise..
ReplyDelete