

I picked out some fabric that day at the store with the kiddos (where they managed to talk me into buying them superhero and princess fabrics that are being used as capes and tents) and started taking the chair apart later that day.
 |
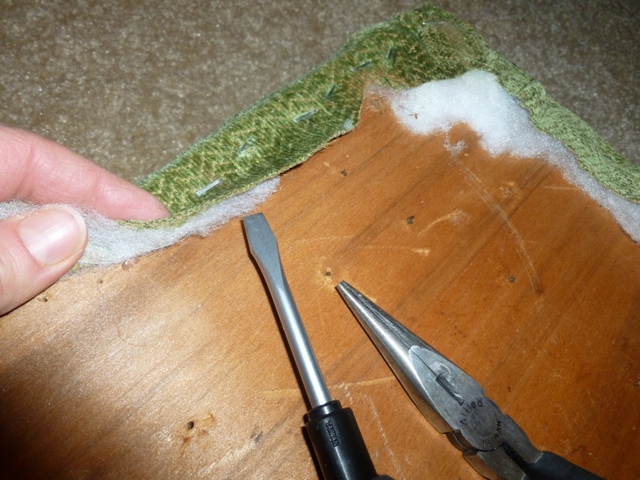
| Wood base ready for new foam |
Picking out fabric proved more difficult than I had originally thought it would be. I decided to go ahead and be bold- when has that scared me before? (My kitchen and dining room are an aqua/turquoise color!)

Here is the seat after the foam, thin layer of batting and then the fabric are stapled on all sides. The batting is used for more cushion and to protect us from the wood seat corners. I first thought that maybe I didn't need the batting, but in the end I'm glad I used it.
After stapling to one side, I pulled straight across to make sure the fabric was even on the seat top (which is upside down on the floor in the photo) and stapled the side across from that. I also lifted it up and checked to make sure one spot wasn't being pulled too tightly across.


Then, finish off the corners like you are wrapping a gift- I didn't worry too much about how I did it. You could also do little gathers, but this was pretty thick fabric so I didn't think that would work as well. I had to remove a couple of the staples I had just done so I could tuck the fabric underneath further.


You can see his Spiderman fabric on the floor in the background; I think he wants to staple it to stuff now.

Much nicer and brings a fresh look to the room!
Before

After


The flower fabric makes me smile too.
~Sally
Have a recent project to share? Feel free to do so in the comments!

Now that chair has such sass! Love the fabric choice! Thanks so much for partying with me at Drab to Fab on Friday! This week's party is up, so come on back with more of your fab ideas!
ReplyDeleteAmy @ Sugar and Spice
http://www.amynjesse.com/2012/03/drab-to-fab-link-up-7-features.html